At first, I add a sun shade light to make my room look realistic as a real world with sunlight. It will have the light that looks like it comes from outside of the window. I do some rotate to make the light lighting my whole room down to the ground and the shadow appears on the wall and the sofa. And I create a area light in front of the window to light the wall that has the window. And I also add two area light on one side of the sofa. At last, I add an ambient light on the top of the desk to adjust my whole room's luminance.
3D Maya Blog
Thursday, 9 June 2011
week14
This week I start to add the light. I think it is the hardest part.
At first, I add a sun shade light to make my room look realistic as a real world with sunlight. It will have the light that looks like it comes from outside of the window. I do some rotate to make the light lighting my whole room down to the ground and the shadow appears on the wall and the sofa. And I create a area light in front of the window to light the wall that has the window. And I also add two area light on one side of the sofa. At last, I add an ambient light on the top of the desk to adjust my whole room's luminance.
At first, I add a sun shade light to make my room look realistic as a real world with sunlight. It will have the light that looks like it comes from outside of the window. I do some rotate to make the light lighting my whole room down to the ground and the shadow appears on the wall and the sofa. And I create a area light in front of the window to light the wall that has the window. And I also add two area light on one side of the sofa. At last, I add an ambient light on the top of the desk to adjust my whole room's luminance.
Sunday, 29 May 2011
week12
This is week 12. I have almost finished my texturing.
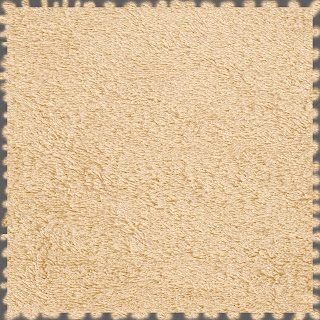
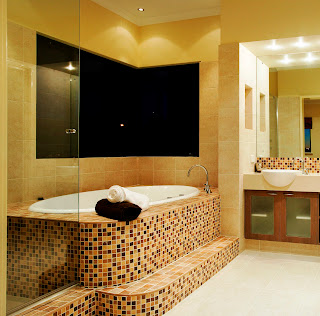
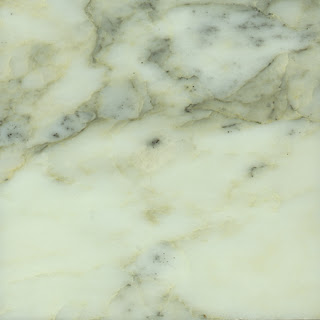
Here are the texturing images that I used when I do my texturing.
For some of them I used photoshop to change the colour to fit my source images.
This one I used for floor. For the fllor, I use the phongE material because of the floor has the specular gloss.
This one is I used for carpet. I add the gree edge to fit the look of my smaple. I use the pump map to made it look realistic.
This is the pump map.
This one is for the stone wall.
This is the pump map for wall.
This one is used for desk.
This one I used for sofa pillow. I use this kind of flax instead of the pure colour one.
This is the pump for pillow.
This one I used for sofa.
This is the pump map for sofa.
This one is for the flowerpot.
This is the pump map fpr flowerpot.
This one I used for window-shades.
This one I used for the picture on the wall.
This one is for the fire.
For the fire wall, I create a phongE material, and then I add a mirror effect.
This is the final look at this stage.
Most of them I use the automatic mapping. And then I select the UV in UV editor, and I use the scale tool to scale my UV map to fit my source maige and get a high resolution.
Most of them I use the automatic mapping. And then I select the UV in UV editor, and I use the scale tool to scale my UV map to fit my source maige and get a high resolution.
Sunday, 22 May 2011
week11
Finally, I have already desided to work on this one.
This is what I got right now, I use the polygon to create my sofa seperately, and for the backrest, I use the cut face tool to add the new line, and then I can work out the this one with the radian. And also I use the bevel tool to help me to edit a smooth edge. Same method of doing the base of sofa part. The table I also use the polygon tool to create 3 cube, and then combine together.
For the bowl on the table, I use the cylinder to model. I delete the top faces of the cylinder, and then use the select contiguous tool to select the edges and then extrude and scale it, Then I use the cut face tool again for three times to add more lines to help me make the bowl smoother. And then I use the "3" key to smooth it.
For the bottle, I got some problem, I have already tried many times, and also watched lots of online tutorials, it still does not work. I will try on the school's computer tomorrow. And I create a big cube, delete some faces then I got the wall and the ground. And also do some really basic polygon shape. These are what I got at this stage.
This is my research when I do the bottle part. I use this one as a guide.
For this week's reasearch. I remember the first week, Jeff gave us a good example. This is a new kind of media technology, It is really cool! It is called The Official Ralph Lauren 4D Experience - New York .
I use this one as the online tutorial to find how can I model the pillow. It used the nCloth tool.
Sunday, 15 May 2011
week10
For the assignment02, I have already desided to do the photo-realistic scene one. I do some research, and I found lots of images as the reference.
These are my rearch at this stage.
I also find some textures.
Sunday, 8 May 2011
week09
This week is the first time of introducing the 3d animation. Mark shows some really basic skills when people doing a simple animation by using the maya.
Same as the 2d animation, the first class of doing an animation are all talking about how to animate a bouncing ball.
Same as the 2d animation, the first class of doing an animation are all talking about how to animate a bouncing ball.
This one could be my favourite one of the 3d animations.
I am doing the 2d animation work when I was in bachelor. In my opinion, the biggest difference between 2d animation and 3d animation is: the 3d one, we can do the modelling first, after we finished the modelling we have already have all the different views of an object. On the other hand, the 2d animation, all the views and angles we have to draw frame by frame by ourselves. I love 2d animation even though it really takes a long time to create, but since I finished, I could feel really happy and also have the sense of accomplishment. All the stuff I just do it by my hand and also frame by frame.
At this stage, I do not the exactly understand of how to create a 3d animation work, but I have to say 3d technique is the most popular one now. And also I think 3d can be used in many different kinds of media industry.
I also do some researches of the 3d animation videos.
This is a show reel of the 3d animation, I think it is really good. We can get some inspiration of the 3d animation.
This one is a funny 3d animation story. For me, I think it is cool!
Sunday, 24 April 2011
week08
This is week is the week 08. For this week's class we just spend time of doing our first assignment. I will put some materials of what I have done.
Finally, I choose this one to work on. When I doing this assignment, I found lots of problem, I do revision of the tutorials that I have done the previous 7 weeks. And also I do some more research of the tutorials to get help.
This is my final work of the 3d scene. For the grass and the cask, and also a stone I use the textures to edit them. For the others, I just use the shaders to add the simple colors. For the hot spring, I use the source from the hapershade tool. For the sky, I just import a sky image.
I use the extrude tool to model the character, the mouth is another model, I just combine them together. I did not have enough time to do more with my character. I have not start to do some movement of the character yet. That is why my character just stand on the top of the hot spring.
Most of my models which I use the extrude tool to create. I think extrude is the easiest one of the differents kinds of the modelling methods.
The lighting is really difficult, I add 4-5 lights, at the end, my scene's light looks very poor. I will fix it when I have time.
Sunday, 17 April 2011
week07
This week we start to learn the knowledge of lighting, camera and the rendering. These are very important role in doing 3d work, especially the lighting part. And it is also very complex, as Mark said, he could spend 3 years of only teaching lighting. It really takes time if we wanna create a perfect lighting mood.
Saying of lighting has the important role of doing 3d work, it does not only due to the complex of lighting technique. It is also very useful and cannot be forget skill. I think both lighting and texturing are very important. They are the same roles in 3d area. The effect of them is the same I think. Both of them are the life of the 3d work.
The importance of lighting in 3d is like the importance of light in our real life. They are the crown of creation.
I find some good examples online.
The lighting they have can shows the time of the day and also we can find some clue of the story of these 3d scenes. The lighting helps to present the scenes better.
I find an online tutorial and also follow the tutorial to do the lighting part.
I follow this tutorial since the modelling part, and then finally work out it with the lighting.
This is what have I done after watching the tutorial.
These are the textures I found for my assignment01, I will use some of them. For the other objects, if I have plenty time to work on, I will find some more high quality textures to edit my scene. If we do not have lots of time, I will do that by using shaders to add the simple colour. I think if I make it only using the simple colour it will be fine, because of my scene is a cartoon style work. It could work.
Subscribe to:
Comments (Atom)


